Building a web app with Noir and Barretenberg
NoirJS is a Typescript package meant to work both in a browser and a server environment.
In this tutorial, we will combine NoirJS with Aztec's Barretenberg backend to build a simple web app. From here, you should get an idea of how to proceed with your own Noir projects.
You can find the complete app code for this guide here.
Dependencies
Before we start, we want to make sure we have Node installed. If you don't have it already you can install it here, we recommend using Yarn as our package manager for this tutorial.
We'll also need version 1.0.0-beta.20 nargo installed, see the Noir installation guide for details.
We'll keep this barebones. Doing the bare minimum is not only simple, but also allows you to easily adapt it to almost any frontend framework.
This means we can start with the dependencies even on an empty folder:
yarn add @noir-lang/noir_js@1.0.0-beta.20 @aztec/bb.js@3.0.0-nightly.20251104 buffer vite vite-plugin-node-polyfills@0.17.0
Wait, what are these dependencies?
noir_jsis the main Noir package. It will execute our program, and generate the witness that will be sent to the backend.bb.jsis the Typescript interface for Aztec's Barretenberg proving backend. It also uses thewasmversion in order to run on the browser.
In this guide, we will install versions pinned to 1.0.0-beta.20. These work with Barretenberg version 3.0.0-nightly.20251104, so we are using that version too. You can also try older or later versions.
Setting up our Noir program
ZK is a powerful technology: an app can prove that a computation was carried out correctly without revealing some of its inputs, and Noir lets you express this in a single line of code.
For syntax highlighting and editor support, check out the Language Server.
A Noir program needs a main.nr and a Nargo.toml file. nargo new scaffolds both for us:
nargo new circuit
This creates a circuit directory containing a Nargo.toml (already populated with the package name and type = "bin") and a src/main.nr.
To make our program interesting, let's give it a real use-case scenario: Bob wants to prove he is older than 18, without disclosing his age. Open circuit/src/main.nr and replace its contents with:
fn main(age: u8) {
    assert(age > 18);
}
This program accepts a private input called age, and simply proves this number is higher than 18.
This is all that we need to get started with Noir.
Compiling the circuit
Before we can execute a Noir program, we need to compile it into ACIR, an abstract representation of the circuit.
This can be done by cd-ing into our circuit directory and running the nargo compile command.
cd circuit

nargo compile
This will write the compiled circuit into the target directory, which we'll then load into our JS later on.
Setting up our app
A single html file and a single js file are enough for this app. Let's create them in the project root:
touch index.html index.js
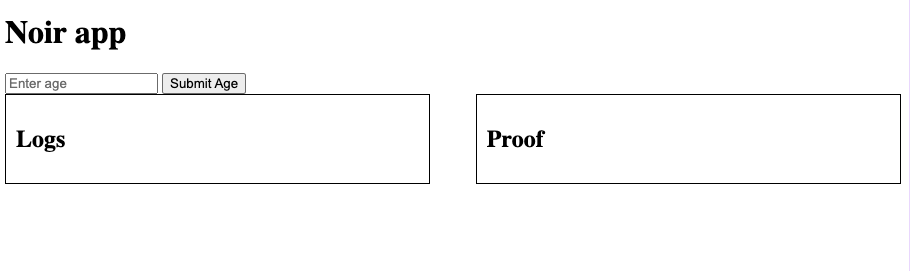
And add something useful to our HTML file:
<!DOCTYPE html>
<head>
  <style>
    .outer {
        display: flex;
        justify-content: space-between;
        width: 100%;
    }
    .inner {
        width: 45%;
        border: 1px solid black;
        padding: 10px;
        word-wrap: break-word;
    }
  </style>
</head>
<body>
  <script type="module" src="/index.js"></script>
  <h1>Noir app</h1>
  <div class="input-area">
    <input id="age" type="number" placeholder="Enter age" />
    <button id="submit">Submit Age</button>
  </div>
  <div class="outer">
    <div id="logs" class="inner"><h2>Logs</h2></div>
    <div id="results" class="inner"><h2>Proof</h2></div>
  </div>
</body>
</html>
This is a minimal UI: some CSS to make two boxes that will display output on the screen.
For the JS, rather than logging everything to the console, we'll add a small helper to display output on the page. Paste this boilerplate into index.js:
const show = (id, content) => {
  const container = document.getElementById(id);
  container.appendChild(document.createTextNode(content));
  container.appendChild(document.createElement('br'));
};

document.getElementById('submit').addEventListener('click', async () => {
  try {
    // code will go in here
  }  catch {
    show('logs', 'Something went wrong');
  }
});
At this point in the tutorial, your folder structure should look like this:
.
├── circuit
│   ├── Nargo.toml
│   ├── src
│   │   └── main.nr
│   └── target
│       └── circuit.json
├── index.html
├── index.js
├── package.json
├── etc...
Some more JS
Next we want to execute our circuit to get the witness, and then feed that witness to Barretenberg. Both packages are straightforward to work with. Let's import them at the top of the file and initialize the WASM modules:
import { Barretenberg, UltraHonkBackend } from '@aztec/bb.js';
import { Noir } from '@noir-lang/noir_js';
import initNoirC from '@noir-lang/noirc_abi';
import initACVM from '@noir-lang/acvm_js';
import acvm from '@noir-lang/acvm_js/web/acvm_js_bg.wasm?url';
import noirc from '@noir-lang/noirc_abi/web/noirc_abi_wasm_bg.wasm?url';
import circuit from './target/circuit.json';
// Initialize WASM modules
await Promise.all([initACVM(fetch(acvm)), initNoirC(fetch(noirc))]);
And instantiate them inside our try-catch block:
show('logs', 'Creating Noir...');
const noir = new Noir(circuit);
show('logs', 'Creating Barretenberg... ⏳');
const barretenbergAPI = await Barretenberg.new();
show('logs', 'Created Barretenberg... ✅');
show('logs', 'Creating UltraHonkBackend...');
const backend = new UltraHonkBackend(circuit.bytecode, barretenbergAPI);
Executing and proving
Now for the app itself. We're capturing whatever is in the input when the user presses the submit button. Inside our try block, let's grab that input and get its value. Noir will execute it and give us a witness:
const age = document.getElementById('age').value;
show('logs', 'Generating witness... ⏳');
const { witness } = await noir.execute({ age });
show('logs', 'Generated witness... ✅');
For the remainder of the tutorial, everything will be happening inside the try block
Now we're ready to prove. Let's feed some inputs to our circuit and calculate the proof:
show('logs', 'Generating proof... ⏳');
const proof = await backend.generateProof(witness);
show('logs', 'Generated proof... ✅');
show('results', proof.proof);
Our program is now complete. To serve it conveniently, we can use a bundler like vite by creating a vite.config.js file:
touch vite.config.js
Noir needs to load two WASM modules, but Vite doesn't include them by default in the bundle. We need to add the configuration below to vite.config.js to make it work.
We also need to target ESNext since bb.js uses top-level await, which isn't supported in some browsers.
import { defineConfig } from 'vite';
import { nodePolyfills } from 'vite-plugin-node-polyfills';

export default defineConfig({
  plugins: [
    nodePolyfills({
      // Whether to polyfill specific globals.
      globals: {
        Buffer: true,
        global: true,
        process: true,
      },
      // Whether to polyfill `node:` protocol imports.
      protocolImports: true,
    }),
  ],
  // Serve the app cross-origin isolated so the browser exposes SharedArrayBuffer
  // and Barretenberg can prove across multiple threads. A production host must
  // send these same headers on the page (and any documents it embeds).
  server: {
    headers: {
      'Cross-Origin-Opener-Policy': 'same-origin',
      'Cross-Origin-Embedder-Policy': 'require-corp',
    },
  },
  preview: {
    headers: {
      'Cross-Origin-Opener-Policy': 'same-origin',
      'Cross-Origin-Embedder-Policy': 'require-corp',
    },
  },
  optimizeDeps: {
    exclude: ['@aztec/bb.js'],
  },
  resolve: {
    alias: {
      pino: 'pino/browser.js',
    },
  },
});
This should be enough for vite. We don't even need to install it, just run:
yarn vite dev
If it doesn't open a browser for you, visit localhost:5173. You should now see the minimal UI with a single input.
Now, our circuit requires a private input fn main(age: u8), and fails if it is less than 18. Let's see if it works. Submit any number above 18 (as long as it fits in 8 bits) and you should get a valid proof. Otherwise the proof won't generate correctly.
The contents of the "proof" box aren't meant to be human-readable; it's the raw proof data.
Verifying
Generating a proof isn't enough on its own; we also want to verify it. Let's add these lines to verify the proof:
show('logs', 'Verifying proof... ⌛');
const isValid = await backend.verifyProof(proof);
show('logs', `Proof is ${isValid ? 'valid' : 'invalid'}... ✅`);
You have successfully generated a client-side Noir web app!
Next steps
At this point, you have a working ZK app that runs in the browser (and on mobile too).
If you want to continue learning by doing, here are some challenges for you:
- Install nargo and write Noir tests
- Change the circuit to accept a public input as the cutoff age. It could be different depending on the purpose, for example!
- Using Noir's Rust-like syntax, write a struct
Countrythat implements a traitMinAgewith a methodget_min_age. Then, make a structPersonhave au8as its age and a country of typeCountry. You can pass apersonin JS just like a JSON objectperson: { age, country: { min_age: 18 }}
For more examples, see how NoirJS is used with common frameworks in the awesome-noir repo.